
Welcome to the wonderful world of Divi!
This is the first of a new series on the Jenn’s Web blog that will help you to understand how to edit a WordPress website built using the Divi theme. I have been working on quite a few projects using Divi from Elegant Themes. It’s a great tool for building sites fairly quickly and flexible enough to know that I can adapt it to pretty much any change a client requests.
What makes Divi so special?
Although many WordPress themes have a page builder plugin bundled in, I would often find myself boxed in by colors, typography and layouts that were coded in such a way that if a client requested a change, I had to run around creating custom styles and generally wasting valuable time fighting with code that didn’t allow for design flexibility.
Even though Divi is a theme that also has page builder capabilities, it is developed in a way that allows you to build your own custom layouts and gives one a lot more creative control and design flexibility. You can easily build pages with various column configurations and customize each individual section. Want the middle of your page to break out into six columns with images that act as button links? No problem! Want a video gallery to have a gradient as its background? Easy!
With Divi you can:
Have control over your site’s header layout.
Choose to have a full page width, or boxed layout.
Create custom sidebar layouts and footer layouts
Save page layouts and individual modules in a library to use elsewhere on the site.
Create custom styles for an individual module for its display on different devices.
So, let’s dive into Divi!
Editing an existing page
Bear in mind that this series is aimed at Jenn’s Web clients who have websites built using the Divi theme. So, this assumes that 1: You wish to edit images and text that already exists, 2: Your site is using WordPress 5.0 or later, and 3: Your site already has the Classic Editor plugin installed by Jenn’s Web that will allow you to access the Divi builder option for your site’s content.
How to open a page or post to access the Divi editor
WordPress has recently changed its system for editing pages in a way that can honestly, be pretty confusing. For now, the “default” WordPress editing setup doesn’t even let someone access a page builder tool like Divi at all! But don’t panic, the folks at WordPress (very wisely) realized that not everyone was going to want to learn a whole new interface just to create a blog post, so they created a plugin called “Classic Editor” to let you use the old method to edit content. It also allows you to create pages and posts with the Divi editor.
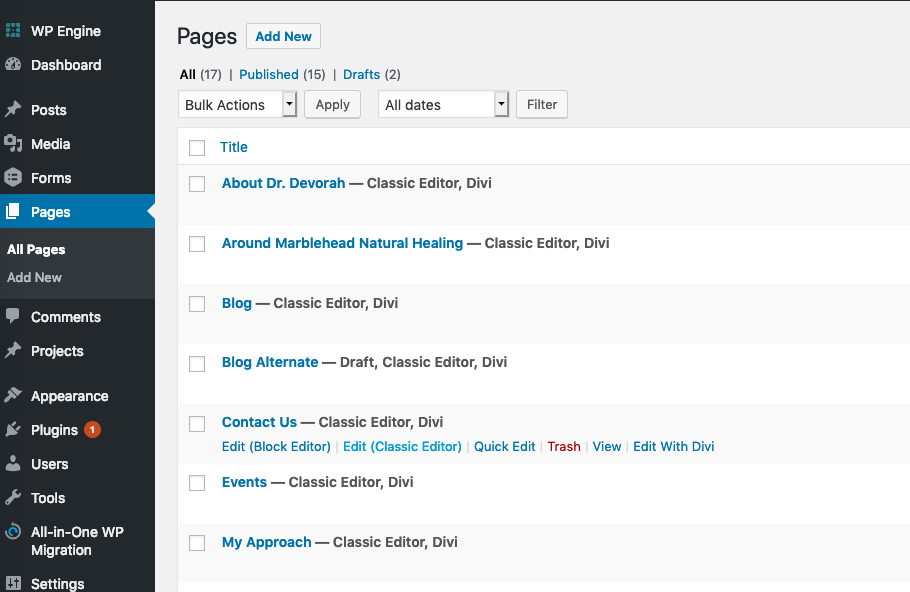
If you open up the Pages window in the WordPress dashboard and hover over the title of the page you want to edit, you will see a small menu appear underneath the page title. Click on the link “Edit (classic editor)” in order to see the Divi interface.
Now,
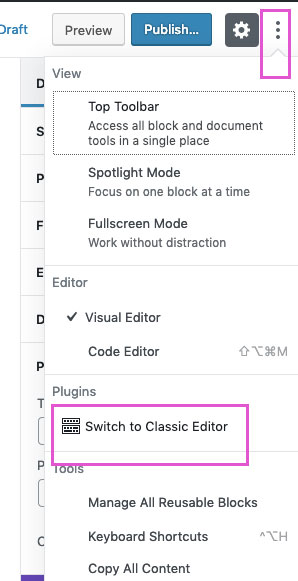
If you are creating a new page or post, OR, editing existing content created without using the Divi builder and want to switch to using that tool instead, here’s how to switch. It would be great if the folks at WordPress gave us a nice big obvious CLICK HERE TO USE CLASSIC EDITOR button, but in their drive to make the new user interface look as sleek and clean as Squarespace, WP decided to put one of the most useful tools behind a tiny column of dots at the top right of your window. Click on that to access the Classic Editor choice. (it took me a while to find it too!)
Choosing to edit using Divi
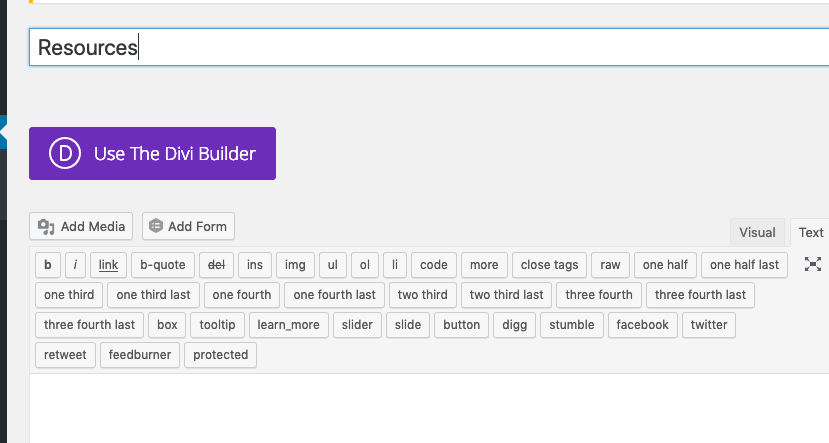
If your page is new, or you want to convert the content to Divi, simply click on the purple “Use the Divi Builder” button to get started.
If it was previously built with Divi, you should see something like this
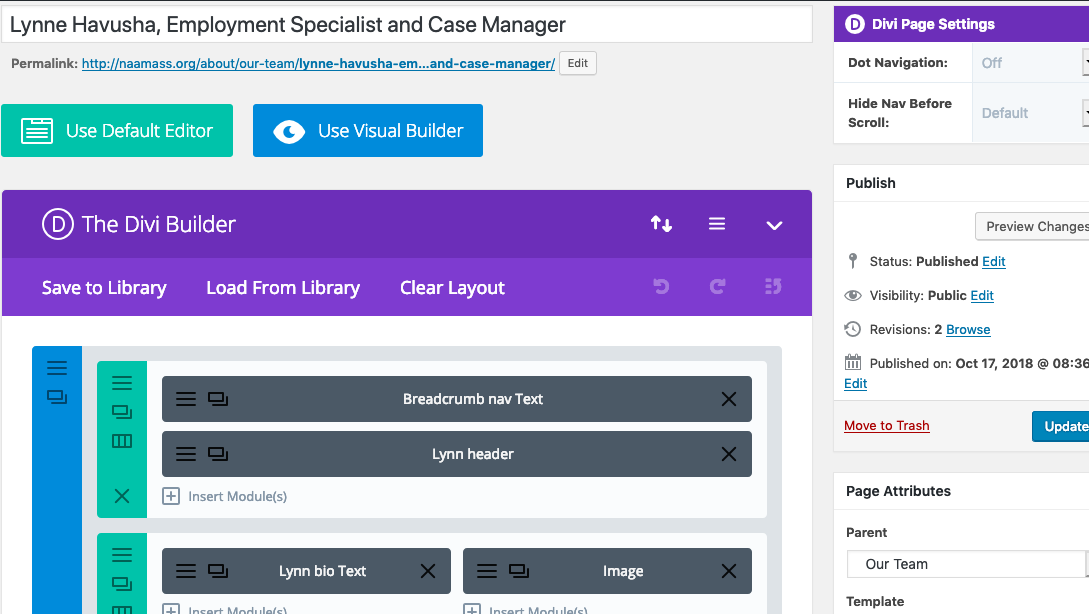
If you look at the image above of a page layout in Divi, I just want to give you a quick tour. Divi is, overall, a system of creating rows with columns in an easy way without having to concern yourself with learning how to code HTML and CSS by hand. You simply click on “Insert Row” and choose a column layout and then start inserting modules.

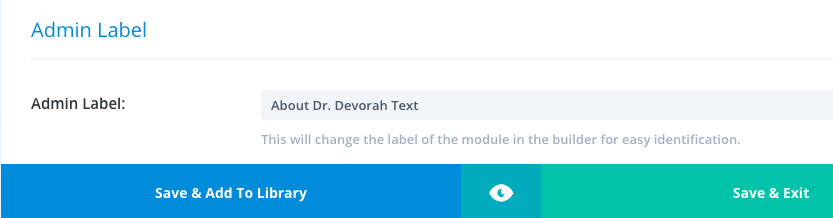
Also, notice in the example above that the modules have specific labels. As a developer who frequently “inherits” websites from other developers to maintain for a client, I am a BIG fan of documenting your work. Divi really helps with this because you can label a module with it’s specific content. I recommend doing this when you create a module so you can look at something you created a while ago and instantly know which piece to open up to change.
You can label a module by scrolling down to the bottom of that module and editing the Admin Label field.
Editing a module
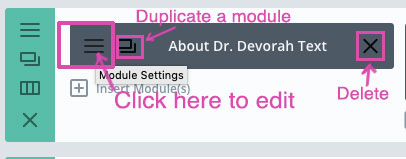
Every Divi module has three common icons: Settings (three horizontal lines), Duplicate (two linked rectangles) and Delete (X symbols) like in the image below.
When you open up a Divi module using the Settings button, you can choose to edit its content (such as a text module) or configure settings and design choices. Something I do to save time is create one module such as a button, divider or slider, and get its settings and design configured exactly to what I need, and then clone that module as much as I need on the page. If you want to then use that module on a different page, then you should add it to the Divi Library. More on that later!
Next, I will show you how to edit text and image modules and use a Divi Library template to manage an Event page.