

Siteground is a hosting company that I recommend to some clients if they are looking for a way to utilize email addresses with their domain name. Of course, you can also use GSuite (which my other favorite host, WPEngine supports), but many clients find the Siteground method to be less cumbersome and it’s already included as part of the hosting package. It’s a matter of preference and how many logins you feel like you want to keep track of.
Siteground’s cPanel allows you to add an email account and then set up a forwarder to a different email. For example, your organization may want a consistency to official email addresses to make it easier for your clients to remember someone’s contact info.
However, you may want your organization’s employees to be able to get emails sent to their email addresses that are already set up on their phones and desktop email programs such as Outlook. Here’s how you can go about setting up a system to do this and then I can show you how to check your Siteground email inbox directly.
As you set up email addresses for your co-workers, make sure to keep track of any passwords needed send test all new accounts and forwards to make sure everyone can stay in touch!
Setting Up An Email Account on Siteground
Step 1: Log into your Siteground account.

Logging in via siteground.com’s home page
Step 2: From the Welcome screen, go to your cPanel by clicking on My Accounts and then in the next screen, on the cPanel button.
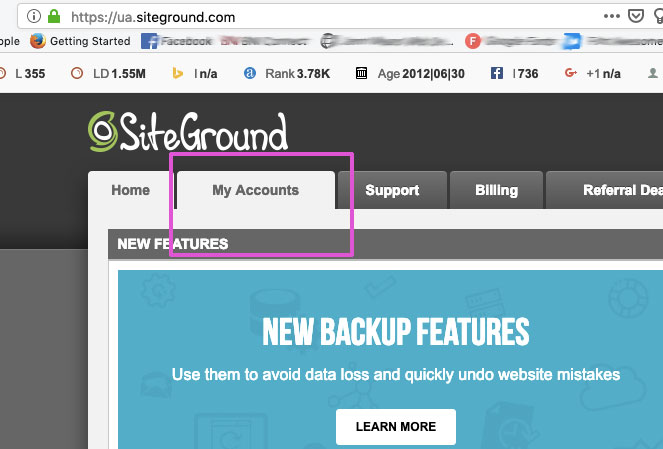
Click on “My Accounts”
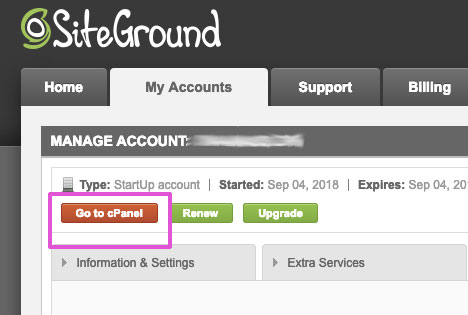
Click on the red cPanel button to access your hosting dashboard
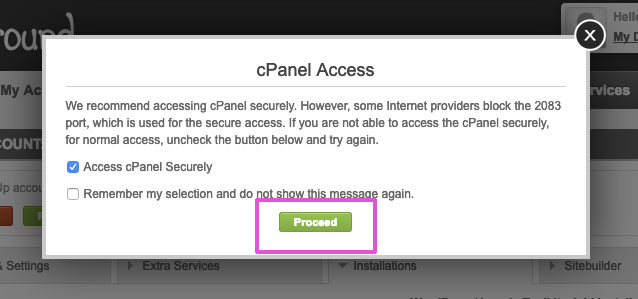
Click on Proceed to continue to your cPanel
Step 3: Click on “Email Accounts” in the cPanel dashboard
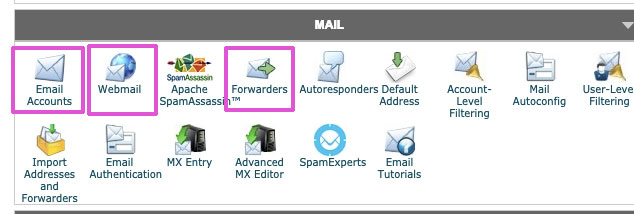
The 3 areas of email management we are covering in this tutorial
Step 4: Assign an email address and create a password for that address.
Step 5: Send the new email address and password to the person that email address was created for.
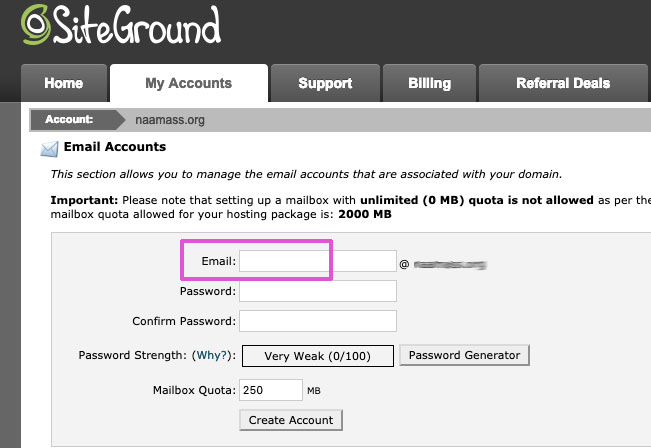
Add the name to the email address and create a STRONG password
NOTE: You could send this new email address and password info to their email address that they are currently using, OR, if you are also setting up a forwarding email (see below) you could wait and send the info all at once when you test the forwarder.
TIP: If you have Google Docs or some other secure online method of taking notes (or send an email to yourself), make sure you keep track of the email addresses and passwords you create. And, always, make sure that you get a “strong” rating on the password you set up.
TIP: Once you are working with the email dashboard, you can return to the cPanel home page by clicking the red “cPanel home” button at the top right of your screen.

Button to main cPanel dashboard
Setting Up An Email Forwarder for a Siteground Email Account
Step 1: In cPanel, go to “Email Forwarders”.
The 3 areas of email management we are covering in this tutorial
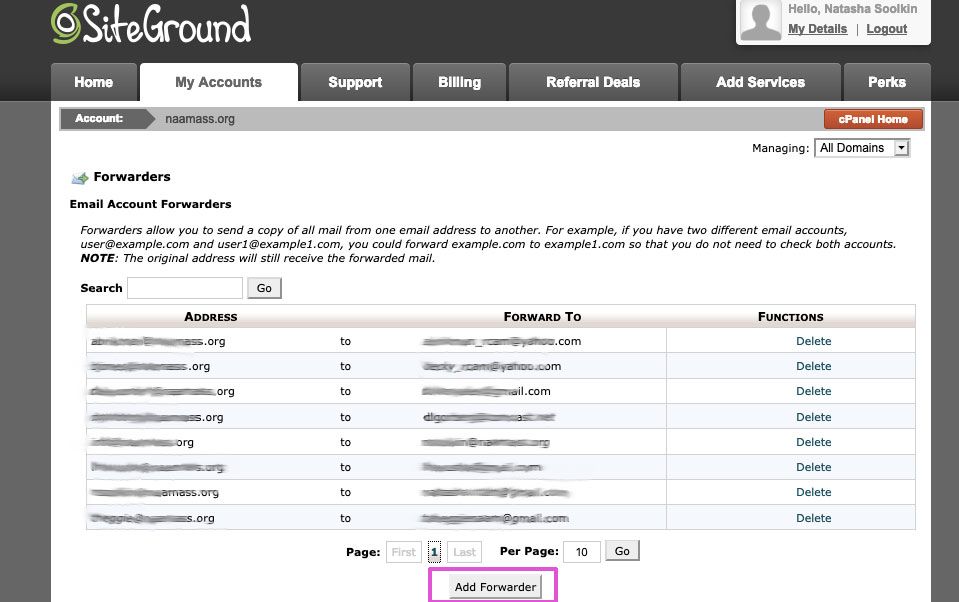
Step 2: Click on “Add Forwarder” button at bottom of the page (in this case, it’s under the previously created forwarders.
Step 3: Enter Siteground email account such as “info” and then enter in the email address you wish to forward that to.
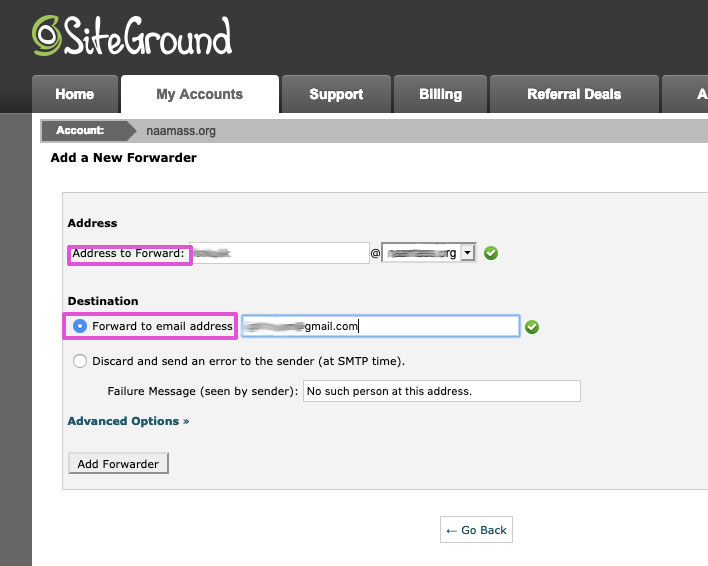
Step 4: Send a test email to the Siteground email address and make sure to ask them to reply so you know that the forwarder is working!
Checking Your Webmail Using Siteground
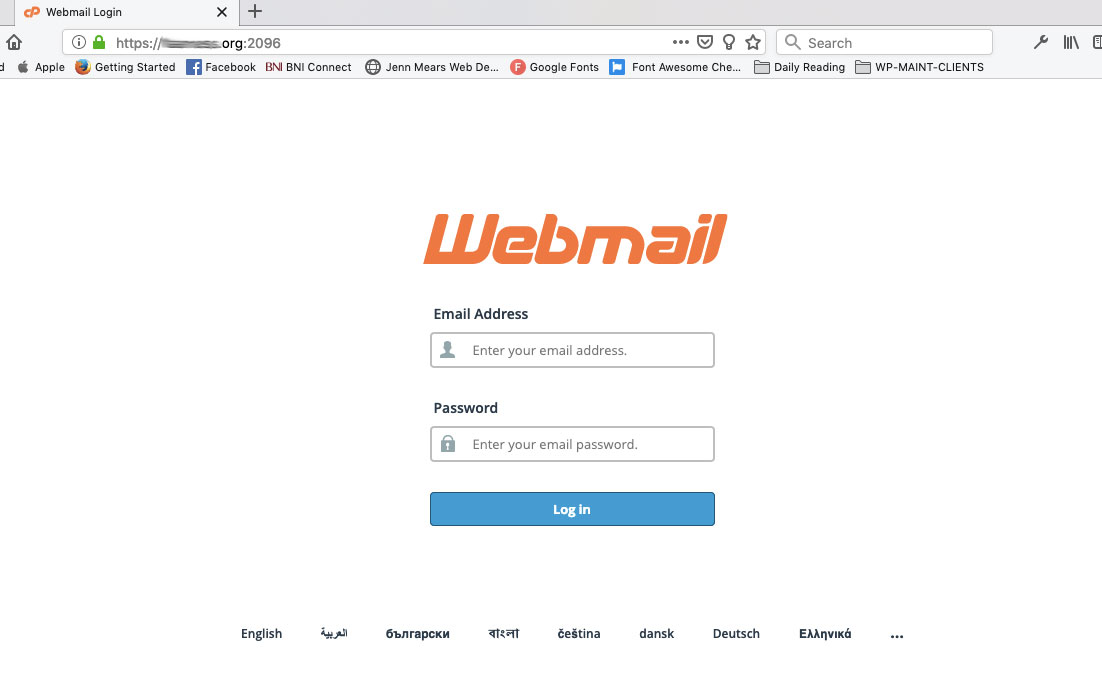
There may be times when you do want to directly access your webmail via Siteground. You don’t need to log into the hosting account/cPanel to do so. Anyone who has their Siteground-generated email address and their own email password can do so using a url that is something like this:
https://yourdomain.com:2096/
Step 1: Go to the url for your webmail. It should be set up like the link above, but, obviously, use your actual domain instead of yourdomain in the address.
TIP: if you are using your own personal computer, phone, etc., it’s worth the trouble to bookmark this url so you don’t have to go hunting it down every time you want to check your webmail inbox.
Step 2: Log in using your email address (such as info@yourdomain.com) and the password that you chose for that email address.
Step 3: Choose an email client. It doesn’t make a huge difference which one you use. When you choose the “Make this my default” option, it will prompt you to set up a profile and signature. And, next time you log in, it should open up to that email client.
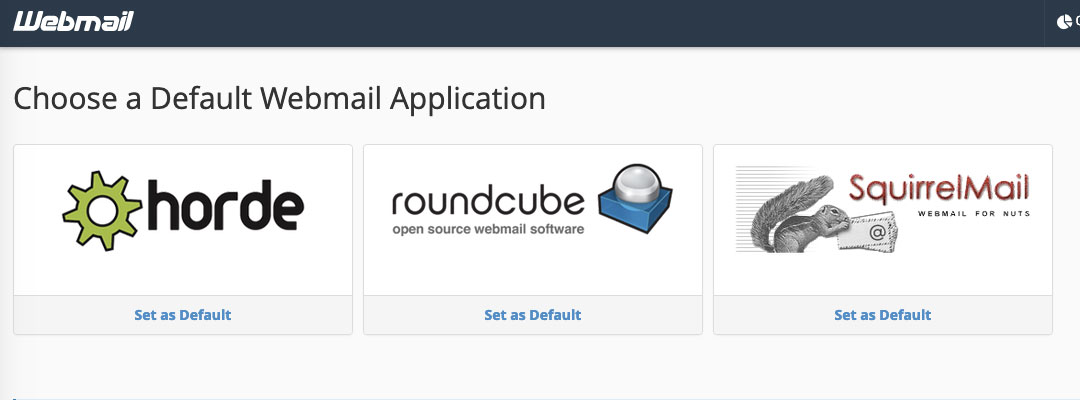
3 choices of email inbox tools
Does it matter which email tool I use?
Purely a matter of preference. I personally don’t have a favorite. Here’s a guide that can help you decide which one works best for you.
NOTE: there are instructions below your 3 choices of email client that will walk you through setting up an inbox on your device should you wish to receive your email from Siteground directly and not via an email forward.
Step 4: You should now be able to manage your email from here.
In my experience, Siteground does a pretty good job at keeping your email inbox free of spam. Some other hosting companies don’t and folks need to go in and mass delete loads of “vacation giveaways” and other garbage that filled up their inbox to capacity. It is a good idea to log in from time to time to your email address’ inbox and take a look to make sure you aren’t too close to your storage limit.
Featured image courtesy of Edoardo Tommasini from Pexels


Magnificent website. Plenty of useful info
here. I am sending it to a few friends ans also sharing in delicious.
And certainly, thanks to your effort!