Of course, if you are reading this a week from now, chances are Facebook has decided to change how this looks, but trust me-once you have the basics of how this is done, you will be able to muddle through how to figure it out. I had to just to write this! 🙂
Sometimes (not often, but sometimes), it’s a good idea to allow a trusted friend, co-worker or web site developer to take on a role in keeping your Facebook Page up to date, or your developer may need to connect an application and needs to have access to the page’s inner workings to do so. That said, use this knowledge wisely.
Step 1: Ask your future collaborator to “Like” the page. This will let Facebook know that they are “cool” and it’s ok to suggest them in a couple of steps from now.
Step 2: Log into Facebook to access your Facebook Page. If you are the person who created the page and it’s in your name, or, your local Social Media Guru set it up and made you an admin, you can access your page from your profile. Just click that little upside-down triangle in the top right corner of Facebook.

Step 3: Click on the Page you want to add an Admin to.

Step 4: Now that you are on the Page, click on Settings

Step 5: In the left side column, click where it says Page Roles

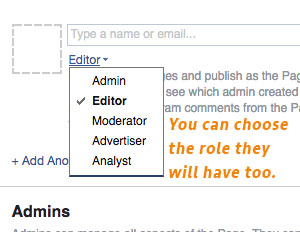
Step 6: Now, all you need to do is start typing in the name of the person you want to make an Admin, Editor, etc.
Don’t feel like giving someone the keys to the entire kingdom? Don’t worry, you can choose which role your new collaborator can play.
Once you select the new person and assign a role, Facebook will notify them that they have a new role on the page.
And there you have it. Sometimes all you need to do in life is click the tiny triangle!
Editor’s note:This is an updated version of my original post here


